
The Gift Of Graft: New York Artist's Tree To Grow 40 Kinds Of Fruit http://www.npr.org/blogs/thesalt/2014/08/03/337164041/the-gift-of-graft-new-york-artists-tree-to-grow-40-kinds-of-fruit?sc=18&f=

Custom Search
Showing posts with label Arts and Crafts. Show all posts
Showing posts with label Arts and Crafts. Show all posts
Monday, August 4, 2014
Thursday, October 25, 2012
DIY Red Glittery Shoes
 |
| Photo 1: DIY Glittery Red Pumps |
Transform an old pair of heels into glittery heels for $6 in one day!
 |
| Photo 2: Chew marks on heel. |
 |
| Photo 3: Old Pumps |
I am glad I never got around to throwing away one of my favorite pumps that my dog decided to use as a chew toy. I wanted candy red glittery shoes to match my Halloween costume this year, and I didn't find the ones in the store all that comfortable.
Not only are these shoes comfortable, but they look just as great as the ones I have seen in the store and cost a fraction of the price to make. The key is too use extra fine glitter to give it a higher-end look. Then using an acrylic red glitter glaze to seal in the glitter so that the glitter stays on your shoe.
Materials:
- Sandpaper (optional)
- Shallow tray (optional)
- Old pair of high heels
- Old newspaper
- 2 oz bottle of Glamour Dust (Ultra Fine Glitter Paint in "Sizzling Red") by Decor Art
- 2 oz jar of Ruby Extra Fine Glitter by Art Minds
- 1" wide paint brush
- Optional: I omitted this step but if you have shiny, smooth shoes, I would recommend taking a piece of sand paper and slightly scuffing up the surface so that the paint and glitter has a better surface to adhere to.
- Lay out newspaper over your work area or work over a tray.
- Clean your shoes, and allow it to dry completely. Then stuff crumpled newspaper or tissue in the pumps. See Photo 4.
- Glitter-fying Your Heels. Do the following two steps in sections to minimize messiness. I divided the each shoe into three sections: right half of the pump, left half of the pump, and then heel.
- Apply a thin layer of paint on the first section of each shoe.
- Generously sprinkle fine glitter over the paint. Then tap the side of the shoe so that the excess sprinkles fall off. See Photo 6.
- Repeat steps 1 & 2 until shoes are covered with a layer of glitter. Then I did the process again so that there were ultimately two coats of glitter/paint on the shoes.
- Allow shoes to dry for about an hour. Rinse your brush and allow it to air dry.
- Seal in the Glitter. Use the paint to seal in the glitter on your shoe. I squeezed paint on to the shoe and then used the brush in a gentle tapping motion until the surface was covered with a thin layer of paint. I worked in sections again to reduce messiness. See Photo 7.
- Allow shoes to cure for 24 hours before wearing them.
 |
| Photo 4: Newspaper stuffed into pumps |
 |
| Photo 5: Paint drizzled on to pump. |
 |
| Photo 6: Glitter sprinkled on shoe |
 |
| Photo 7: Paint to seal in glitter. Appears red when applying, but dries clear. |
 |
| Photo 8: Finished product |
Tuesday, July 17, 2012
Crocheting Summer Baby Blanket
| Photo: Crocheted Summer Baby Blanket |
I am crocheting a light, lacey crib blanket this summer. I have been taking my time doing a little here and there, and I can see this becoming a regular thing because I find it so relaxing.
I am almost done with my first ball of LION BRAND Babysoft yarn in Pink Lemon, and I am about half way done with my project so I will probably end up using one or two more balls of yarn to create a 27" x 38" crib blanket with decorative edging.
For you crocheters or soon-to-be crocheters who like this pattern just look up the "Snapdragon Snitch" pattern from 63 Easy to Crochet Pattern Stitches : Combine Stitches to Make Throws, Pillows, Totes & More (Leisure Arts 3916)
Wednesday, July 11, 2012
Succulents in a Shell
 |
| Photo: Succulents in a Shell |
My friend gave me this beautiful succulent arrangement that she made herself! I love how she arranged the succulent cuttings in this large shell.
Monday, July 9, 2012
Garden in a Bottle

Creating the garden
The first step in bottle gardening is to clean and wash the bottle thoroughly with running water and soap. Using a paper funnel made of newspaper, place a thin layer of charcoal, a layer of pebbles and then coarse as a drainage medium....
To learn more about how you can create your own garden in a bottle, click on the following link
http://ph.news.yahoo.com/garden-bottle-062421162.html
Original Post: Manila Bulletin
Wednesday, December 28, 2011
Recycled Magazine Makeup Brush Holder

Photo: Recycled Magazine Makeup Brush Holder
I finally got around to trying that recycled magazine project I blogged about earlier this year. I decided to create a makeup brush holder by using pages from my Glamour magazine to decorate a tin can. It was a lot easier than I thought, and it took me less than a couple of hours to complete this project. Continue reading to see step by step instructions on how to create this makeup brush holder.
- Scissors
- Magazines
- Ruler
- Pencil
- Tape
- Rubberband
- Tin Can (cleaned and dried)
- Elmer's Glue
- Glue Gun
Directions
- Tear out pages from your magazine that has a lot of pretty colors, prints, text and/or images.
- Measure your tin can's height. Then cut strips from magazines that are the same height. For example, my tin can was about 4.5" so I cut sheets of paper that had a height of 4.5".

- Then lay a single sheet down, and fold the rough edge of the paper about 1/4" so that you have a straight edge. Then take the pencil and roll it so that the magazine wraps around the pencil.


- Secure the tube with a small piece of tape (i.e., about 1/4" of tape). Repeat this process until you have enough tubes to surround the entire tin can.


- Wrap the rubber band around the tin can. Then slip the tubes of magazines under the rubber band to see if you like your design.


- Plug in your glue gun, and place two droplets of glue at the top and the bottom of the can (See Photo with yellow stars below). Then place the first tube down. Make sure that it is align with the bottom of the can. Then place a thin layer of glue on the side of the tube (See Photo with pink start below). Place another thin layer of glue on the tube, and then place two more droplets of glue on the can. Then secure with another tube. Repeat this process to the end. Secure with a rubber band until project dries.


Monday, May 16, 2011
Seed Favors
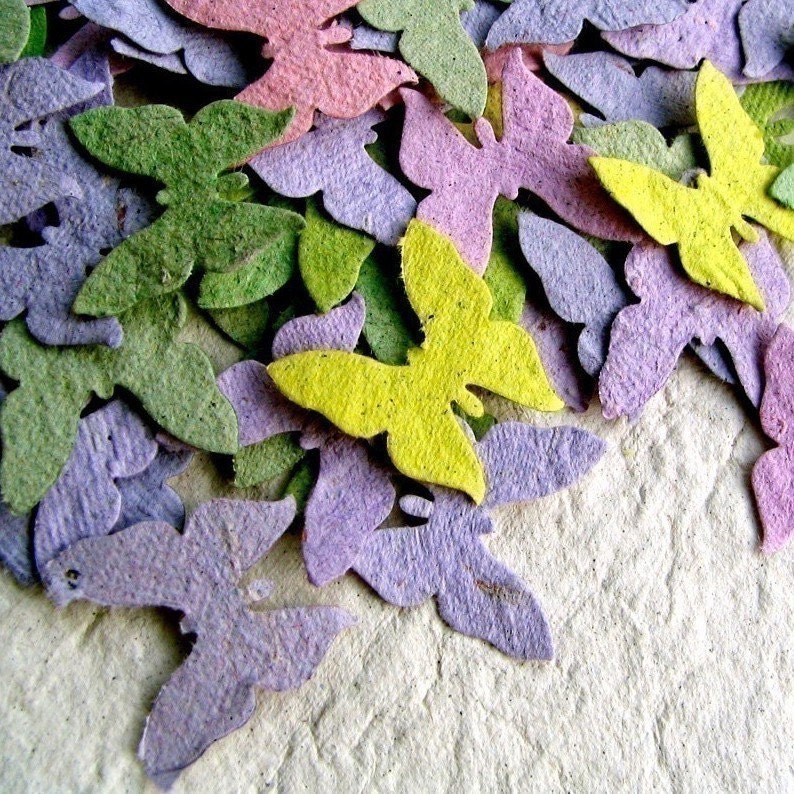
Photo Credit: Recycled Ideas
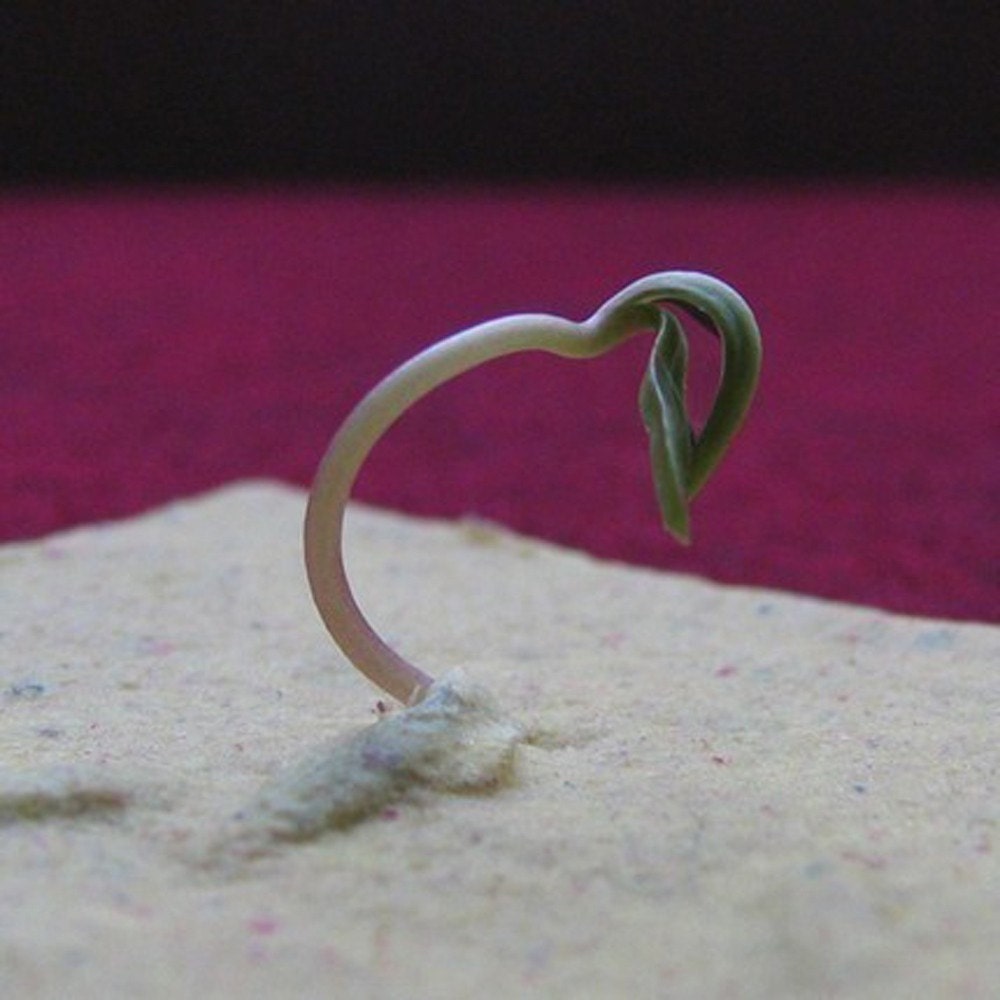
Photo Credit: Recycled Ideas
If you are planning a wedding, baby shower or birthday party soon consider giving your guests eco-friendly plantable seed favors. I love the seed favors created by recycledideas. Their handmade seed favors are available in the shapes of cowboy boots, hearts, stars, puppies, birds, trees, bunnies, giraffes and more. They also have plantable confetti, seed bombs, plantable seed cards, tags and more.
Sunday, April 3, 2011
Plastic Knife Plant Labels

Photo: Early Corn plant label made out of a plastic knife
Have you ever wondered what to do with those plastic knives you get with your take-out orders or have leftover from a mixed plastic cutlery set? Turn them into plant labels!
You can make simple plant labels by using a plain permanent marker (not the fine point kind) to label the knife handle. Alternatively, you can dress up your plant labels like I did with a little paint and creativity. Keep reading for instructions on how to make your own weather-resistant or weatherproof plant labels out of plastic knives.
Directions on How to Make Plastic Knife Plant Labels
- old clothes or smock
- newspapers
- masking tape
or objects to weigh down newspaper
- sand paper (220 grit)
- plastic knives
- paint brushes
- artist palette
or old plate
- acrylic paint
(I used Winsor & Newton Galeria
- cup to hold water (I used the bottom half of a plastic water bottle)
- paper towel (moistened)
Directions

Photo: Prepping the work area

Photo: Finished plastic knife plant labels
- Preparation. Change into old clothes or put on a smock
. Then find a comfortable place to paint. Prep your work area by laying down newspaper to prevent paint from accidentally ruining your furniture. Weigh down or tape the edges of the newspaper to the table. Then gather the rest of your materials.
- Sand the Plastic Knife Handle. Roughen up the surface of the plastic knives
with sandpaper
. Then wipe down the knife
with a moist paper towel. Allow the knife
to dry. This will create a better surface for the paint to adhere to, and prevent the paint
from peeling off the plastic.
- Prepare a Design or Dive In. Acrylic dries quickly so I like to think about what I will draw and what colors I will use prior to painting, but feel free to dive in and start painting.
- Paint. Start painting. I painted in layers. First, I mixed blue and white on my palette
to create a light blue paint. Then I painted the knife
- Stick it in the Ground. Place the knife
Monday, March 21, 2011
Succulent Wreaths

Photo: Succulent Wreath at Home Depot
Home Depot is selling succulent wreaths! If you would like to create your own, Better Homes and Gardens (BHG) has a great slideshow with pictures and instructions here.
Sunday, March 20, 2011
Hanging Succulent Baskets

I saw these moss covered hanging baskets filled with an assortment of succulents at Home Depot. I love that you can hang these planters on the walls. You can bring plant life to your apartment or home without using up any precious outdoor floor space.
Our local Home Depot are selling them for $29.98 each. This price is hard to beat if you had to purchase each component separately (i.e., individual plants, soil, moss, twine, and basket). You could create a similar piece by filling a coco fiber
Tips:
Prior to filling the basket, attach the moss to the basket exterior with twine or omit it all together if you prefer the look of coco fiber
If you choose a deep basket, consider filling the bottom half of the basket with clay balls
Whether you are hanging your basket on the wall or from the ceiling, make sure that it is secured to the stud(s) instead of drywall.
Subscribe to:
Posts (Atom)