Translate

Custom Search

Naturopathica

Showing posts with label seeds. Show all posts

Monday, July 16, 2012

Fennel Seeds Ripening

Photo: Fennel Seeds Ripening

The fennel seeds are ripening.  Hopefully, this time I can harvest a good amount of fennel seeds before the birds make a snack out of them.  I am going to use the seeds to flavor meats and possibly make fennel tea.

Friday, July 13, 2012

Chervil

Photo: Chervil Seedlings

My chervil plant produced a bunch of seeds.  I just stripped them right into this area in the garden, and now I have a whole bunch of chervil seedlings.

Tuesday, July 10, 2012

Compost Surprise

Photo: Strawberry Plant

Photo: Mystery Plant

I fertilize my plants weekly with compost tea (i.e., water mixed with finished compost).  I allow certain seeds to enter my compost bin, and as you can see some of these seeds have made a home in my garden.  

I identified the first one as a strawberry plant, which I will happily keep.  I am also going to keep the second set of plants just to see what it is.

Continuous Sunflower Blooms

Photo: Successive Plantings of Sunflowers

The sunflowers are blooming against the fence.  I used last year's harvest of sunflower seeds.  The new flowers are smaller in size, and it is probably due to lack of consistent watering and over crowding.  I just threw a bunch of seeds in a row and covered it with soil.

I actually prefer the smaller sunflower heads for floral arrangements.  I planted a new row of sunflowers right in front of the old one.   I am staggering the plantings so that I can have a wall of continuous blooms.

Harvesting Scallion or Green Onion Seeds


Photo: Last Season's Scallion Seeds Sprouting


Photo: Scallion or "Green Onion" Seed Head

Turn left over green onion stalks into a whole bed of scallions.  All you have to do is plant the unused scallions in the soil, and allow at least one stalk to thicken and flower.  The flower will eventually form seeds, which you will use to plant a new bed of green onions.  You can continue to take cuttings from the other scallions for cooking.  

You will know when the seeds are ready to be harvested when the stem of the plant turns yellow, and you may even see some of the black seeds ready to spill out.  

Cut the stem under the seed head during a dry time of the day.  To save the seeds all you need to do is shake the black seeds into a bag or shake the seeds directly into your garden bed.  The seeds should sprout within a week as long as you provide adequate water.  


Monday, April 30, 2012

Sunflowers Emerging

Sunflowers Sprouting (2012)
Sunflowers Emerging 2012

Last year I harvested a lot of sunflower seeds.  This year I planted the seeds along the fence to create a wall of sunflowers.  I still have about a half of gallon-size Ziploc bag full of seeds from last year's harvest!

Saturday, April 28, 2012

DIY Apple Carton Seedling Starter

Apple Carton Seedling Starter

This empty apple carton looked like it could be a great seedling starter.  Keeping the soil evenly moist is critical in getting seeds to germinate, and as you can see in the photo above, this container traps moisture well.  This is my first time using this type of container, but I have high hopes.

DIY Apple Carton Seedling Starter

Materials:
  • Empty apple container or similar container.  We got this one from Costco.
  • Permanent Marker
  • Potting soil
  • Seeds
  • Water (use a hose with a mister nozzle, a spray bottle, or gently pour water from a cup)
  • Pen and Paper (to track what seeds you planted)
Directions: 
  1. Close the container, and number each dome.  This makes recording what you planted in each dome easier. 
  2. Open the container, and fill each space with soil.  
  3. Then plant your seeds in each pod, and make sure you write down which seeds were planted in each pod.
  4. Then gently water the soil in a way that does not disturb the seeds.  Water until the soil is moist, but not soggy.  
  5. Close the container and place it on a level surface in a shady area.  Then wait!  You should not have to water the plant for several days.  Only water the soil if it looks or feels dry to the touch.


Photo of Empty Apple Carton
Empty Carton

Photo of Empty Apple Carton Converted into Seedling Starter
Planting Seeds in Empty Apple Carton


Sunday, April 22, 2012

Happy Earth Day!


Borage Seeds from last year are emerging from the soil

Happy Earth Day everyone!  Sunny and warmer days are finally here, and I have been hard at work in the garden.


Newly Planted Strawberry Surecrop Bed

New Transplants: 
  • Strawberry "Surecrop" - I planted a new bed of surecrop strawberries.  These were advertised to be high-yielding crops at an average of 3 pints of berries per plant, and is supposed to be a consistent producer.  
  • Early Girl Tomato - This hybrid tomato plant is an early producer and is supposed to bear 5oz fruits. 
  • Grape "Catwaba" - These grapes are supposed to be great for making jams and jellies, and even red wine or champagne.  I will have to patient because this is its first year, and grapes generally produce fruit in their second or third year.
  • Raspberry "Thornless Canby" - This plant is suppose to produce extra large, bright red raspberries, but I chose it mostly because it is thornless.  
  • Horseradish 
  • Jalapeno

From Seed:
  • Radish "Early Scarlet"
  • Spinach "Bloomsdale"
  • Red Giant Mustard Greens
  • Cantelope
  • Black Zuccini
  • Bell Pepper "Yellow Monster"
  • Watermelon "Sugar Baby"
  • Elephant Garlic
  • Edamame
  • Sugar Snap Peas
  • Bell Pepper "Horizon"
  • Stuttgarter Giant Onion
  • Swiss Chard "Northern Lights"
  • Anise
  • Balm
  • Siam Queen Thai Basil
  • Sweet Basil
  • Caraway
  • Fragrant Lavender
  • Chives 
  • Horehound
  • Sweet Marjoram
  • Peppermint
  • Sage
  • Summer Savory
  • Dill
  • Calendula
  • Marigold
  • Sunflowers
  • Carnation (mix)

Cuttings - I am attempting to propagate the following plants by cuttings.
  • Maple Tree (green)
  • Purple Ice Plant
  • Geraniums
  • Mosquito (repelling) Plant
  • Hydrangea


Saturday, December 24, 2011

Winter Gardening in California

I love California for many reasons, but one of them is being able to garden throughout the winter!  Here are some of the things still growing in the garden in December:

Photo: Romaine Lettuce

Photo: Bok Choy

Photo: Mustard Greens

Photo: Cilantro

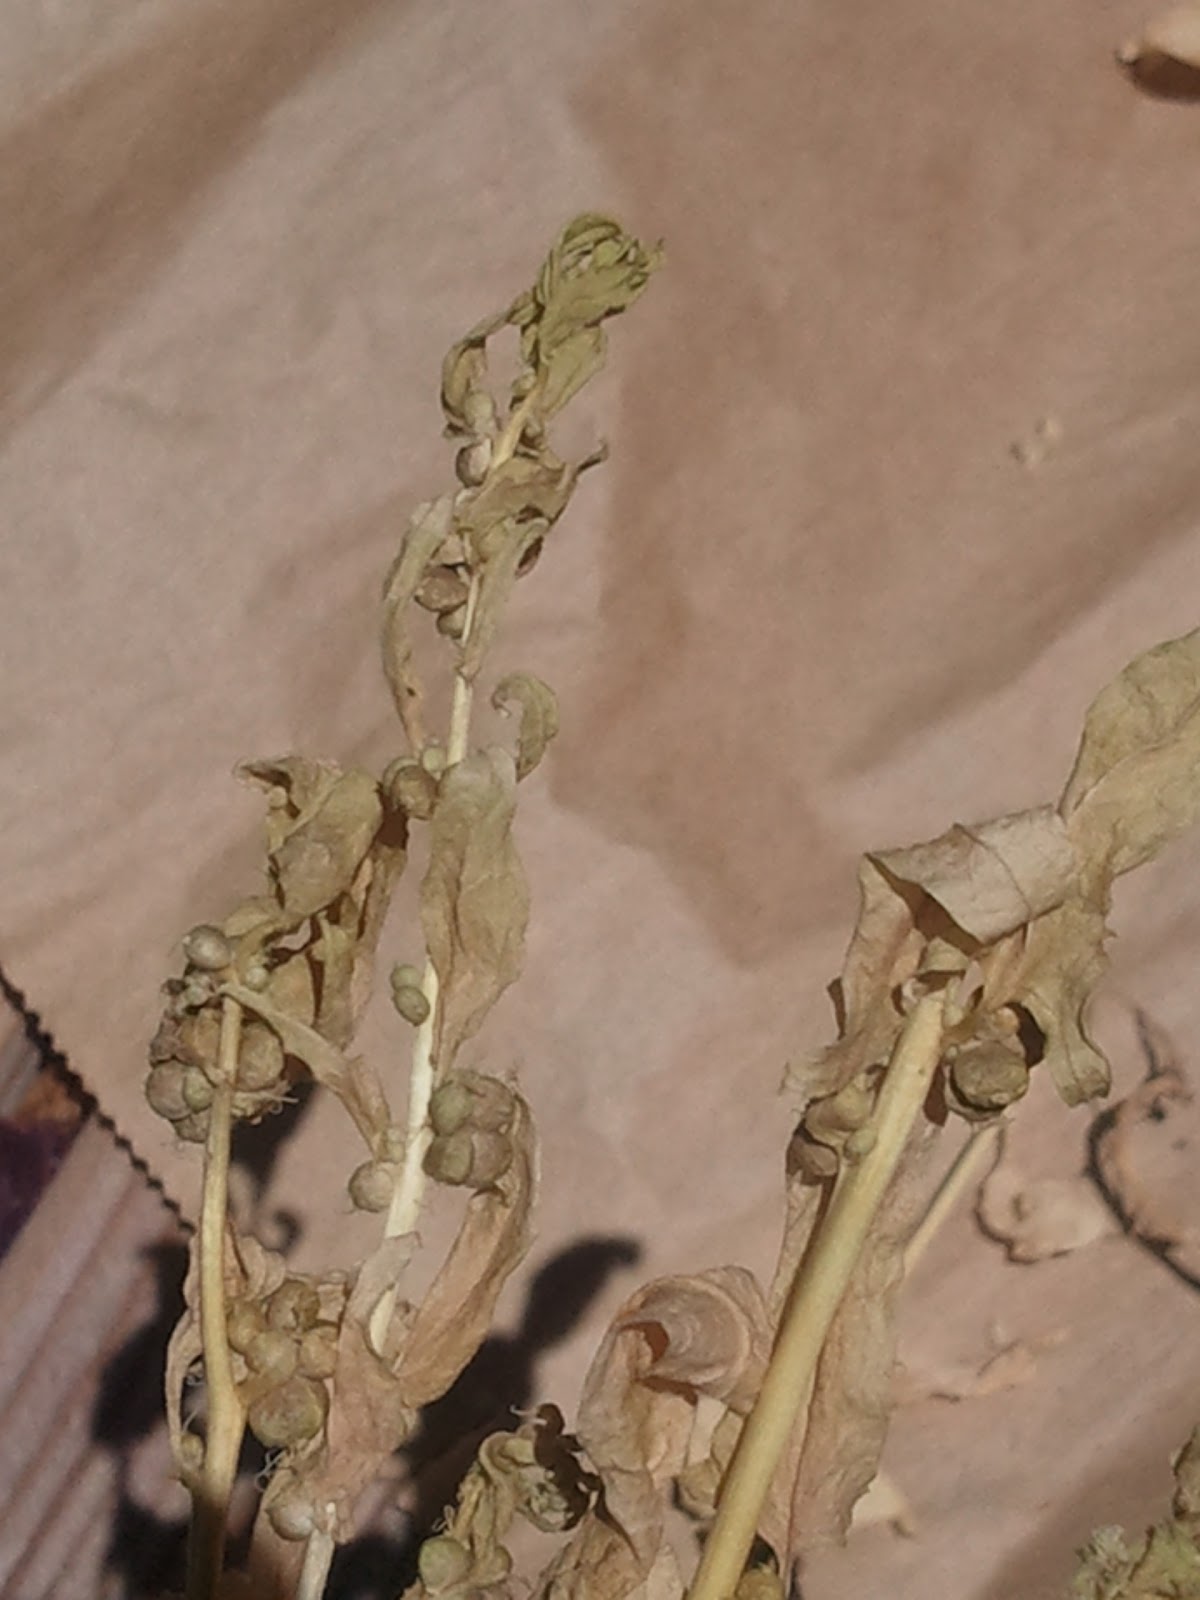
Photo: Salad Greens going to seed

Photo: Bell Pepper

Photo: Fennel going to seed

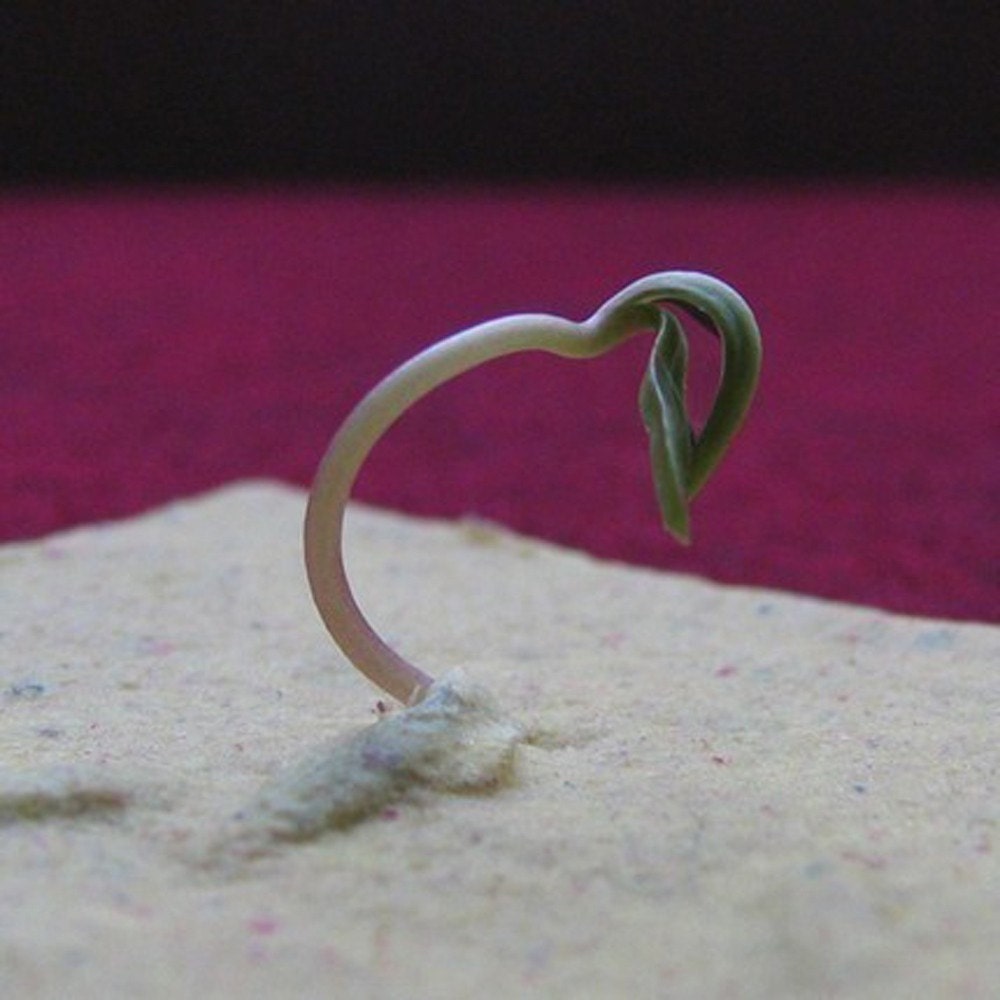
Photo: Tomato seedlings planted in late summer

Photo: Scallions (Green Onions) going to seed

Photo: Pineapple plant grown from planting pineapple head

Photo: Lemon grass shoot given to me by a friend

Our zucchini plant was also still producing zucchini, but I uprooted it because the zucchini were small.  Carrots, onions, shallots and garlic are also still growing as well as sage, English thyme, lemon thyme, rosemary, parsley, and oregano.  Our lime tree is still flowering and setting tiny fruit.  

In general, the plants are growing at a much slower rate.  I think next year I will try row covers or set up cold frames to see if that will improve growth.    
 

Saturday, October 1, 2011

Seeds from Flower Arrangements

Photo: Flower from Flower Arrangement Setting Seeds

It looks like a flower in my flower arrangement produced seeds.  I can't tell if they are good seeds, but I decided to chuck them in the garden anyways and see what happens.  Maybe one will sprout!

Friday, September 30, 2011

Korean Star Melon Surprise

Photo 1: Korean Star Melon

Photo 2: Korean Star Melon Seedlings. 


I threw scraps of Korean Star Melon into my worm compost bin weeks ago.  When I checked on my compost bin, I discovered the seeds had sprouted!  I transferred the seeds into my garden.  Let's see what happens.

Monday, September 26, 2011

Sweet Basil

Photo: Single Sweet Basil Flowering Stalk

Is it not amazing how many flowering stalks can come from a single sweet basil plant?  This one plant is going to produce several basil seeds for next year's garden.  

Saturday, July 30, 2011

More on Cilantro

Photo 1: Cilantro seed heads drying out

Photo 2: New cilantro plants sprouting from seed

There is an article in Sunset magazine that talks about a "better way" to grow cilantro.  The article explains how to grow and harvest cilantro in a way that will provide you a continuous supply of cilantro until the plant goes to seed.
Two square feet of cilantro is more than enough for our family of four.  By rotating the sections we harvested the cilantro from, we were able to have a continuous supply of cilantro for several weeks.  I do encourage you to plant your cilantro in the shade to keep it from going to seed so quickly.  However, if you are a fan of coriander or would like some cilantro seeds, allow your cilantro plant to flower and go to seed.  To learn more about harvesting your own cilantro seeds (also known as coriander), click here.

Wednesday, July 27, 2011

Using Light to Determine Seed Pod's Ripeness

Photo: The light is shining at this bok choy pod in a way that illuminates the round seeds inside.


Quick Tip: Hold up seed pods against the strong sunlight to tell if seeds have formed in the pod.  If pods are ripe, you should be able to see the seeds.   See Photo Above.

Tuesday, July 26, 2011

Planting Pumpkin Seeds for Halloween

Photo: Young pumpkin plant

I planted a couple of pumpkin seeds directly in the soil earlier this month.  I hope I planted them in time for Halloween!  I would love to have a porch full of Jack-o-Lanterns.

Monday, July 25, 2011

How to Harvest Spinach Seeds


Materials 
  • 5 gallon bucket or brown grocery paper bag  
  • Garden shears
  • Strainer with 1/4-inch to 1/2-inch holes
  • Large bowl to catch seeds as they fall
  • Seed container (e.g., envelopes, plastic snack bags, etc.)

Directions
  1. You will know when spinach plants are ready to form seeds when they shoot out a stalk that  produces flowers.  These blooms will disappear and seeds will form in its place.  See Photo 1.    
  2. You should collect the seeds when the plant is dry so avoid collecting them in the early morning or after they have been watered.  
  3. Use the garden shears to cut the spinach stalks off.  
  4. After you cut the stalks, place them in the bucket or paper bag upside down.  Allow the seeds to completely dry out in a cool, dry location.    
  5. After the stalks have dried and turned brown, start collecting the seeds.  See Photo 2.  Place the strainer over the bowl.  Then use your hand to strip the stalk of its seeds using one fluid motion.  See Photo 3.
  6. Remove the strainer.  You can repeat the straining process if you would like to remove more of the leaves.  
  7. Label the seed container with its name and date collected (if desired).  Then pour the seeds into your seed container.  Store seeds in a cool, dry location until you are ready to plant them in the garden.  See Photo 4    
Photo 1: Seeds forming on spinach.

Photo 2: The little balls on the dried spinach stem are seeds.

Photo 3: Seeds and dead leaves are stripped from the stem.

Photo 4: Spinach seeds in a plastic snack bag.

Drying Seed Pods from the Fence

Photo 1: Mustard greens seed pods hanging from fence

If you live in an area that has dry summers, you can dry seed pods from the fence.  All you have to do is gather the stalks into a bundle, and then tie them together with twine or strong string.  Then hang the bundle from the fence.  I just use another string to form a loop, attach it to the bundle, and then hang the loop over a single fence slat.  See Photo 1.

Sunday, July 3, 2011

How to Harvest Bok Choy Seeds

Photo 1: Bok choy plant forming seed pods

Photo 2: Sunlight is illuminating the bok choy seeds inside the pod.

Photo 3: Bok choy seed pods fully mature and brown.

Photo 4: Collecting seeds from bok choy plants

You probably have noticed that some of your plants have grown tall, flowered and formed seed pods.  Instead of cutting these plants down and chucking them in the trash or compost, harvest your seeds for your next planting.  It is easy to do, and saves you from buying more seeds.  I collected more seeds from one single bok choy plant, than what would come in an average seed packet.  I share my extra seeds with family and friends.    

How to Harvest Bok Choy Seeds

Materials: 
  • 5 gallon bucket or brown grocery paper bag  
  • Garden shears
  • Strainer with 1/8-inch to 1/4-inch holes
  • Large bowl to catch seeds as they fall
  • Seed container (e.g., envelopes, plastic snack bags, etc.)

Directions: 
  1. You will know when bok choy plants are ready to form seeds when the bok choy plants grow tall and produces flowers.  These blooms will disappear and seed pods will form in its place upon pollination.  
  2. You should collect the seeds when the plant is dry so avoid collecting them in the early morning or after they have been watered.  
  3. When some of the seed pods start to turn brown, use your garden shears to cut the plant at the base of its stalk.  Note: You can wait until the pods turn completely brown to skip the drying process (step 4), however, you risk some seed pods opening and releasing seeds into the garden.  See Photo 3.  You can also cut the stalk when the pods are still green, but do not cut them too early.  If you do, you risk ending up with little to no seeds.  I chose to harvest my seeds a little early because I have a small garden, and I am eager to reuse that garden space.  See Photo 1.  
  4. Tip: To find out whether your seed pods have seeds in them, hold them up against the sunlight.  Turn the pod so that the sun will hit the pod in a way that illuminates the contents inside.  If you see round seeds inside about (about 1/8" in diameter), you can cut the pods off for drying.  See Photo 2.   
  5. After you cut the stalks, place them in the bucket or paper bag upside down.  Allow the seeds to completely dry out in a cool, dry location.  
  6. You may notice that some of the seeds have already been released in the bucket or paper bag during the drying process.  This is a good sign.   Place the strainer over the large bowl.  Then take a seed pod and use your hands to split it in half lengthwise to release the seeds.  You may have to twist or rub the pods a little to work the seeds loose.  The small brown seeds will fall through the strainer into the bowl, but bigger pieces of debris will remain in the strainer.  After you break your last pod, dump the rest of the contents of the bucket or paper bag into the strainer to collect any remaining seeds.  See Photo 4.
  7. Remove the strainer.  Then pour the seeds into your seed container.  Label the seeds with its name and date collected.  Then store seeds in a cool, dry location until you are ready to plant them in the garden.    

Last Updated: July 25, 2011

Monday, May 16, 2011

Seed Favors

Photo Credit: Recycled Ideas

Photo Credit: Recycled Ideas

If you are planning a wedding, baby shower or birthday party soon consider giving your guests eco-friendly plantable seed favors.  I love the seed favors created by recycledideas.  Their handmade seed favors are available in the shapes of cowboy boots, hearts, stars, puppies, birds, trees, bunnies, giraffes and more.  They also have plantable confetti, seed bombs, plantable seed cards, tags and more.