Translate

Custom Search

Naturopathica

Showing posts with label herbs. Show all posts

Wednesday, August 22, 2012

Make Your Own Freshly Ground Sage in Minutes

Freshly Ground Organic Sage from the Garden
Nothing beats turning high-quality, sage from the organic garden into freshly, ground sage for cooking.  The flavors and the aroma of the freshly ground sage are strong and wonderful for cooking.  I especially love using ground sage in rubs and herb-butter spreads.

If you are growing sage in the garden and own a food processor, you can easily make your own freshly ground sage spice in no time at all.  

Freshly Ground Sage
Comparative Savings Analysis
Source  Money           Time    Other Considerations       
Grocery Store ~$5 + GasTrip to/from Grocery Store   
  • Shelf life - Unknown*
  • Quality - Unknown
Our Garden~$0Less than 5 minutes Active Time
  • Freshly ground
  • Quality - Known
*Ground herbs are normally "good" for six to nine months, and when I say "good," I mean having a strong flavor and aroma. 

How to Make Freshly Ground Sage

Step 1 
Cut a bunch of stems from your sage plant and tie them into a bundle using a rubber band (See Photo Below).  Then hang the bundle upside down in a cool and dark place to allow the sage leaves to completely dry out.  How much time it will take for the leaves to dry out depends on how many stems are in a bundle, airflow, temperature and humidity.  Allow the bundle to dry until the leaves are crunchy.
Organic Sage, Dried


Step 2 
After your sage is brittle to the touch, strip the sage leaves from the stems of the plant and place the leaves into a bowl or directly into the food processor.
Organic Sage Leaves


Step 3
Place the leaves into a food processor (if you haven't already).  I am using a small Ninja food processor.
Dried Sage leaves in Ninja food processor


Step 4
Give the food processor a few pulses until the dried sage is finely ground.  Then pour the sage into your clean container.
Freshly ground organic sage
As you can see, grinding up your spices can take less than five minutes of your time, and is well worth the effort.  Not only will you be getting high, quality herbs from your organic garden, but you will also be saving money and saving yourself a trip to the grocery stores.


Monday, July 16, 2012

Fennel Seeds Ripening

Photo: Fennel Seeds Ripening

The fennel seeds are ripening.  Hopefully, this time I can harvest a good amount of fennel seeds before the birds make a snack out of them.  I am going to use the seeds to flavor meats and possibly make fennel tea.

Monday, June 4, 2012

DIY Apple Seedling Starter Results

Photo: Plants Growing in DIY Apple Carton Seedling Starter


I planted a variety of seeds in a DIY Apple Carton Seedling Starter I created in April. See Post.  As you can see from the photo above, it was a partial success.  Some seeds took off better than others.

What Grew:

  1. Anise
  2. Broad Leaf Sage
  3. Unknown Plant Growing at Peppermint Site
  4. Marjoram
  5. Horehound
  6. Siam Queen Thai Basil
  7. Balm
  8. Leek
Seeds that Failed to Germinate:
  1. Lavender (fragrant)
  2. Summer Savory
  3. Peppermint
  4. Parsley Paramont
  5. Chives

Tuesday, April 24, 2012

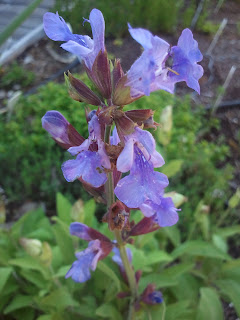
Sage Blooming

My sage plant is blooming.  I love these flowers, and the foliage stays green year round over here.  I am considering planting some in our flower bed.  


Photo of Sage Buds 2012
Sage Buds

Photo of Sage in Full Bloom 2012
Sage in Full Bloom

Sunday, April 22, 2012

Happy Earth Day!


Borage Seeds from last year are emerging from the soil

Happy Earth Day everyone!  Sunny and warmer days are finally here, and I have been hard at work in the garden.


Newly Planted Strawberry Surecrop Bed

New Transplants: 
  • Strawberry "Surecrop" - I planted a new bed of surecrop strawberries.  These were advertised to be high-yielding crops at an average of 3 pints of berries per plant, and is supposed to be a consistent producer.  
  • Early Girl Tomato - This hybrid tomato plant is an early producer and is supposed to bear 5oz fruits. 
  • Grape "Catwaba" - These grapes are supposed to be great for making jams and jellies, and even red wine or champagne.  I will have to patient because this is its first year, and grapes generally produce fruit in their second or third year.
  • Raspberry "Thornless Canby" - This plant is suppose to produce extra large, bright red raspberries, but I chose it mostly because it is thornless.  
  • Horseradish 
  • Jalapeno

From Seed:
  • Radish "Early Scarlet"
  • Spinach "Bloomsdale"
  • Red Giant Mustard Greens
  • Cantelope
  • Black Zuccini
  • Bell Pepper "Yellow Monster"
  • Watermelon "Sugar Baby"
  • Elephant Garlic
  • Edamame
  • Sugar Snap Peas
  • Bell Pepper "Horizon"
  • Stuttgarter Giant Onion
  • Swiss Chard "Northern Lights"
  • Anise
  • Balm
  • Siam Queen Thai Basil
  • Sweet Basil
  • Caraway
  • Fragrant Lavender
  • Chives 
  • Horehound
  • Sweet Marjoram
  • Peppermint
  • Sage
  • Summer Savory
  • Dill
  • Calendula
  • Marigold
  • Sunflowers
  • Carnation (mix)

Cuttings - I am attempting to propagate the following plants by cuttings.
  • Maple Tree (green)
  • Purple Ice Plant
  • Geraniums
  • Mosquito (repelling) Plant
  • Hydrangea


Saturday, December 24, 2011

Winter Gardening in California

I love California for many reasons, but one of them is being able to garden throughout the winter!  Here are some of the things still growing in the garden in December:

Photo: Romaine Lettuce

Photo: Bok Choy

Photo: Mustard Greens

Photo: Cilantro

Photo: Salad Greens going to seed

Photo: Bell Pepper

Photo: Fennel going to seed

Photo: Tomato seedlings planted in late summer

Photo: Scallions (Green Onions) going to seed

Photo: Pineapple plant grown from planting pineapple head

Photo: Lemon grass shoot given to me by a friend

Our zucchini plant was also still producing zucchini, but I uprooted it because the zucchini were small.  Carrots, onions, shallots and garlic are also still growing as well as sage, English thyme, lemon thyme, rosemary, parsley, and oregano.  Our lime tree is still flowering and setting tiny fruit.  

In general, the plants are growing at a much slower rate.  I think next year I will try row covers or set up cold frames to see if that will improve growth.    
 

Monday, September 26, 2011

Sweet Basil

Photo: Single Sweet Basil Flowering Stalk

Is it not amazing how many flowering stalks can come from a single sweet basil plant?  This one plant is going to produce several basil seeds for next year's garden.  

Saturday, July 30, 2011

More on Cilantro

Photo 1: Cilantro seed heads drying out

Photo 2: New cilantro plants sprouting from seed

There is an article in Sunset magazine that talks about a "better way" to grow cilantro.  The article explains how to grow and harvest cilantro in a way that will provide you a continuous supply of cilantro until the plant goes to seed.
Two square feet of cilantro is more than enough for our family of four.  By rotating the sections we harvested the cilantro from, we were able to have a continuous supply of cilantro for several weeks.  I do encourage you to plant your cilantro in the shade to keep it from going to seed so quickly.  However, if you are a fan of coriander or would like some cilantro seeds, allow your cilantro plant to flower and go to seed.  To learn more about harvesting your own cilantro seeds (also known as coriander), click here.

Thursday, July 28, 2011

Peppermint Back from the Dead


Photo 1: Dead mint.  One new mint shoot is growing out of the edge.

Photo 2: Mint growing out of the drainage hole

I neglected to water my wall planters for three days, which meant instant death to my container plants in this California summer weather.  Although my peppermint looked completely dead, I continued to water it hoping it would return.  See Photo 1.  Weeks later I noticed some signs of life in an unusual place.  The mint is growing out of the planter's drainage hole!  See Photo 2.  That mint is one tough cookie!  


Sunday, May 15, 2011

Windowsill Basil Planter

Photo: Windowsill basil planter.  From left to right, cinnamon basil, opal basil and sweet basil.


The Smith & Hawken Basil Grow Pot I started a while ago is growing very nicely.  I am surprised by how flavorful and fragrant the leaves are!  Although I have basil growing in the yard, I do enjoy having some inside the house.  

Click here to view my earlier post on how to easily start grow pots, and to view the steps I have taken to start this grow pot.   

Friday, April 29, 2011

Easier Way to Start Grow Pots

Photo: Successfully Sprouted Basil Seeds in Smith & Hawken Grow Pot

I finally got around to trying the Smith & Hawken Basil Grow Pot that I purchased last December.  The Smith & Hawken basil grow kit comes with a pretty glazed planter, soil and 3 different seed packets (i.e., Sweet Basil, Cinnamon Basil and Opal Basil).

The Smith & Hawken Planting Instructions: 
Remove the seeds and soil bag from the container.  Open the soil bag and pour the soil into the container.  Add lukewarm water to moisten.  Open the seed packets over a paper towel so that the seeds do not get misplaced.  Sprinkle seeds evenly on the soil, with one variety per section.  Press seeds gently into the soil no more than 1/4"deep.  Place pot in a sunny location.  Continue to keep the soil slightly moist by misting the soil until the seeds sprout.  As the plants grow,  gently water whenever the soil feels dry to touch.  Do not overwater, as this will cause roots to rot.  Rotate the planter daily so that each side receives equal sunlight.    

Apt Garden Tips:
  1. Plant Identification.  I divided the soil in thirds, and planted the seeds in alphabetical order (i.e., Cinnamon, Opal and Sweet) so that I will be able to easily identify the plants after they have sprouted.  This works because I can easily identify the front from the back by the design on the planter.  Alternatively, you can use plant markers.       
  2. Sprinkling Seeds.  Hold the seed packet upright and tap the top of the seed packet a few times so that all of the seeds settle to the bottom.  Then snip a small corner off the packet.  Sprinkle the seeds over the soil by turning the packet to the side and gently tapping the other end of the packet so that the seeds come out a little at a time.  This gives you more control over where you want to plant your seeds.  The seed packets come with more than enough seeds.  In fact, I did not plant them all.  I saved some for my outdoor garden.  
  3. Germinating Seeds. Instead of constantly misting the soil to keep the soil moist, just wrap a plastic shopping bag around the planter and tie the handles on the side to seal it.  Then place the whole thing on a sunny windowsill and forget about it for a few days.  The plastic bag will trap most of the moisture.  As the sun warms the soil, the water will evaporate, hit the plastic ceiling, and then "rain" down on the soil again.  After the seeds have sprouted, remove the plastic bag and then water the plants whenever the soil feels dry to touch.          


Saturday, March 26, 2011

Free Online Square Foot Gardening Tool


Gardener's Supply Company has a free online garden planning tool on their website.  It allows you to create and customize garden plans.   You can set the dimensions of your garden bed, drag and drop herbs, vegetables and fruits into each square foot.  The program even recommends how many of each herb, vegetable or fruit to plant in a square foot.  Planting care instructions for each plant you select are displayed below your garden layout.  You can name your garden plan, save it, print it or even email it.  You can also create several garden layouts, and then load them to the site map tool to arrange the garden beds in your overall space.  For those of you who do not want to design your own garden layouts, their website also offers a section of free pre-planned garden layouts.  This is a neat tool and worth checking out!

Gardener's Supply Company

Thursday, February 10, 2011

Kombucha Tea

Yogi Green Tea Kombucha, Herbal Tea Supplement, 16-Count Tea Bags (Pack of 6)

I normally do not like green tea, but I try to drink it for its many purported health benefits (e.g., cancer-fighting properties, weight-loss aid, lowers cholesterol levels, combats mental fatigue, etc.).  My favorite green tea is Yogi's Green Tea Kombucha.  Today I was surprised to learn kombucha is a Manchurian "mushroom."  Who knew "mushrooms" could be yummy?

Kombucha is actually a combination of different elements, which include lichen, bacteria, and yeast.    The mushroom itself is not eaten.  Rather, a tea is made by fermenting the mushroom for about a week in a mixture of water, sugar and green or black tea, with apple cider vinegar or a bit of previously made tea added.  The mushroom can be kept in that mixture to reproduce "daughter mushrooms."   These daughter mushrooms can be used to produce more tea.  

Kombucha is believed to be a natural energy booster and detoxifier that may also help slow or reverse the aging process and may help fight serious diseases like AIDS, cancer and multiple sclerosis.  

I am happy with my Yogi Green Tea Kombucha, but for those of you who want to try brewing kombucha at home, you might want to check out the following: 
Kombucha Brooklyn Home Brew Kit - simple and easy to use!
Kombucha Brooklyn sells Kombucha Home Brew Kits.   

Kombucha Phenomenon : The Miracle Health Tea: How to Safely Make and Use Kombucha

Friday, January 28, 2011

Yogi Echinacea Immune Support

Yogi Echinacea Immune Support, Herbal Tea Supplement, 16-Count Tea Bags (Pack of 6)

Yogi's Echinacea Immune Support tea is my new favorite tea!  It is so delicious that I do not need to add honey or lemon to it.  I brew a cup as soon as I feel a cold coming on, but it is so yummy I drink it all the time.  Safeway and Target carry this brand.  If you have a hard time finding them or want to save money, you can purchase them online.  

Yogi has other great teas.  Among my favorite for the cold season are Yogi Throat Comfort Tea, Yogi Ginger, and Yogi Lemon Ginger.  Yogi also offers a Cold Season Tea Sampler Pack.

Last time I checked, it cost $5.79 for a box of 16 tea bags at Safeway ($0.36/tea bag).  I have seen them on sale for $1 or $2 off the regular price.  You can get even greater savings by buying them in bulk  online at $15.82 for a pack of 6 boxes and enjoy more than 50% in savings ($0.16/tea bag).

Price Break Down (Per Tea Bag)
        Regular Price:  $0.36
                 On Sale:  $0.24 - 0.30
      In Bulk Online:  $0.16*

*Free Shipping on orders over $25